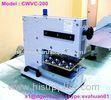
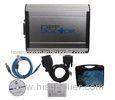
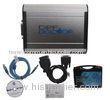
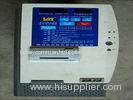
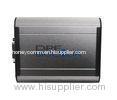
Magnetic Induction and Eddy Current Non Destructive Testing Equipment To Measuring Thickness
| Place of Origin: | Zhejiang, China (Mainland) |
|
|
|
| Add to My Favorites | |
| HiSupplier Escrow |
Product Detail
Features:
With different external probes, the gauge can be applied to measuring thickness of non-magnetic coating on magnetic met
Features:
With different external probes, the gauge can be applied to measuring thickness of non-magnetic coating on magnetic metal substrate, as well as non-conductive coating on non-magnetic metal substrate.
Five types of probes (F400, F1, F10, N1, CN02) are available for different application. F10 probe measures up to 10mm.
Two measuring modes: single or continuous, changeable.
Two calibration methods can be applied to the gauge; And the system error of the probe can be corrected with the basic probe calibration method.
Measured values and user information are shown on a large, easy-to-read LCD. A display back light ensures easy reading of screen data in poorly-lit conditions.
Measuring status indicator showing the measuring status.
The gauges’ user-friendly measuring system permits automatic storage of up to 1000 readings in one memory matrix for later statistical evaluation.
Battery information indicates the rest capacity of the battery.
Auto sleep and auto power off function to conserve battery life.
USB1.1 communication port. Optional software to process the memory data on the PC.
Compact aluminum case,suitable for use under poor working conditions.
Measuring Principles:
The gauge adopts two thickness-measuring methods: magnetic induction method and eddy current method.
insulating coatings on all non-ferrous metals and on austenitic stainless steels, e.g. paint, anodizing coatings, ceramics, etc. applied on aluminum, copper, zinc die-casting, brass, etc.
Working Condition:
Working temperature: -1050;
Storage temperature:-3060;
Relative humidity: ≤90;
The surrounding environment should avoid of vibration, strong magnetic field, corrosive medium and heavy dust.
Technical Data:
Measuring principle: Magnetic induction & Eddy current.
Measuring range: (01250) μm, depends on probes. maximum 10mm for the probe F10. Refer to Appendix.
Low range resolution: 0.1μm.
Accuracy: ±(3%Thickness+1) μm, depends on probes and conditions.
Display:4 digits LCD with EL backlight.
Memory for up to 20 files (up to 50 values for each file) of stored values.
Unit system: Metric (μm), Imperial (mil).
Power source: Two “AA” size, 1.5 Volt alkaline batteries. 200 hours typical operating time (EL backlight off).
Communication:USB1.1.
Dimensions:125mm×67mm×31 mm.
Weight:340g.
Packing List:
|
|
No. |
Item |
Quantity |
Remarks |
|
Standard Config. |
1 |
Main unit |
1 |
|
|
2 |
Probe |
1 |
F1 or N1 |
|
|
3 |
Calibration Foils |
5 PCS |
|
|
|
4 |
Zero plate |
1 |
Iron or Aluminum |
|
|
5 |
Instrument case |
1 |
|
|
|
6 |
Manual |
1 |
|
|
|
7 |
Alkaline Battery |
2 PCS |
AA size |
|
|
8 |
|
|
|
|
|
Optional Config. |
9 |
Other type of probes |
|
|
|
10 |
DataPro software |
1 |
On CD |
|
|
11 |
USB cable |
1 |
|
Related Search
Find more related products in following catalogs on Hisupplier.com

Company Info
Ceramic Substrate Online Market [China (Mainland)]
Business Type:Manufacturer
City: Shenzhen
Province/State: Guangdong
Country/Region: China (Mainland)


